Initial Steps After Storm Damage
Experiencing storm damage can be overwhelming for any homeowner. Knowing the right steps to take immediately after your roof has been damaged can streamline the repair and insurance claim process.
Timely Insurance Claims
Filing an insurance claim promptly after storm damage is crucial to ensure coverage and avoid delays in the repair process. The timeframe for filing an insurance claim after a storm typically ranges from 48 hours to one year (Stronghold Restoration & Roofing), but it’s essential to check your specific insurance policy. Many policies require claims to be filed within 30 days to one year from the date of the incident (Restoration Roofing).
Delaying the filing of a roof insurance claim can result in various issues, including denial of the claim. Acting swiftly after a roof incident can determine the success of an insurance claim, regardless of whether the damage is due to a natural disaster, theft, or accidental damage (Restoration Roofing).
| Timeframe to File a Claim | Coverage |
|---|---|
| 48 hours – 1 year | Typical range based on the insurance provider |
| 30 days – 1 year | Specific to most insurance policies |
For more details on the roof storm damage repair process, it is always advisable to review the policy thoroughly or consult with your insurance provider directly.
Understanding Insurance Policy
Before filing a roof insurance claim, it’s important to fully understand your insurance policy to avoid unnecessary claims, which can have lasting consequences. Claims can stay on record for up to 7 years, even if the payout is minimal (Roof Simple).
Homeowners should familiarize themselves with the two common types of coverage when filing roof claims:
- Replacement Cost Value (RCV): Covers the current cost to replace the roof without accounting for depreciation.
- Actual Cash Value (ACV): Covers the actual value of the roof after depreciation.
| Coverage Type | Description |
|---|---|
| Replacement Cost Value (RCV) | Covers current replacement cost |
| Actual Cash Value (ACV) | Covers value after depreciation |
Understanding these coverages can help you decide the suitable type for your situation and prepare you for discussions with your insurer.
If you’re unsure about the details of your policy or how to proceed with a claim, a professional roofer can provide valuable assistance. It’s recommended to have your roof inspected by a trusted roofer who can accurately assess the damage and liaise between you and the insurance company (Roof Simple). For more tips on how to fix storm-damaged roof, consult with qualified roofing professionals.
Having a good grasp of your policy will aid in navigating the claims process more effectively, ensuring that you get the compensation you deserve for the repair or replacement of your storm-damaged roof.
Types of Roof Damage Coverage
When filing a storm damage roof insurance claim, understanding your coverage is crucial. The two common types of roof damage coverage are Replacement Cost Value (RCV) and Actual Cash Value (ACV). Knowing the differences can make a significant impact on the outcome of your claim.
Replacement Cost Value (RCV)
Replacement Cost Value (RCV) coverage pays for the current cost to replace your roof without deducting for depreciation. Essentially, it covers the full cost of a new roof at today’s prices. This type of coverage can be beneficial because it provides sufficient funds to repair or replace your storm-damaged roof, regardless of its age (Roof Simple).
RCV policies are designed to make the homeowner whole again by covering the cost of materials and labor required to restore the roof to its original condition. Here’s an example of how RCV works:
| Item | Without Depreciation (RCV) | With Depreciation |
|---|---|---|
| New Roof Cost | $10,000 | $10,000 |
| Depreciation | $0 | $3,000 |
| Payout | $10,000 | $10,000 – $3,000 = $7,000 |
Although beneficial, RCV policies are becoming less common. Many insurers are now offering ACV-only policies, which can leave homeowners underinsured (GAF).
Actual Cash Value (ACV)
Actual Cash Value (ACV) coverage pays for the depreciated value of your roof. This means the payout reflects the current value of the roof, taking into account its age and condition at the time of the damage. ACV policies often result in lower payouts compared to RCV, potentially leaving homeowners with significant out-of-pocket expenses (Bill Ragan Roofing).
Here’s how ACV works:
| Item | Without Depreciation | With Depreciation (ACV) |
|---|---|---|
| New Roof Cost | $10,000 | $10,000 |
| Depreciation | $0 | $3,000 |
| Payout | $10,000 | $10,000 – $3,000 = $7,000 |
Under ACV, homeowners might find themselves responsible for covering the gap between the full replacement cost and the depreciated value. This can be particularly challenging if the damage is severe or if the roof is older and has significantly depreciated.
Homeowners should be aware of their policy details before disaster strikes. Some insurers offer RCV coverage for newer roofs but might only offer ACV for older ones. This distinction can be crucial when making a storm damage roof insurance claim.
For more in-depth guidance and tips, check our articles on DIY storm-damaged roof repair and how to fix a storm-damaged roof. Being informed and prepared can help streamline the claim process and ensure you get the coverage you need.
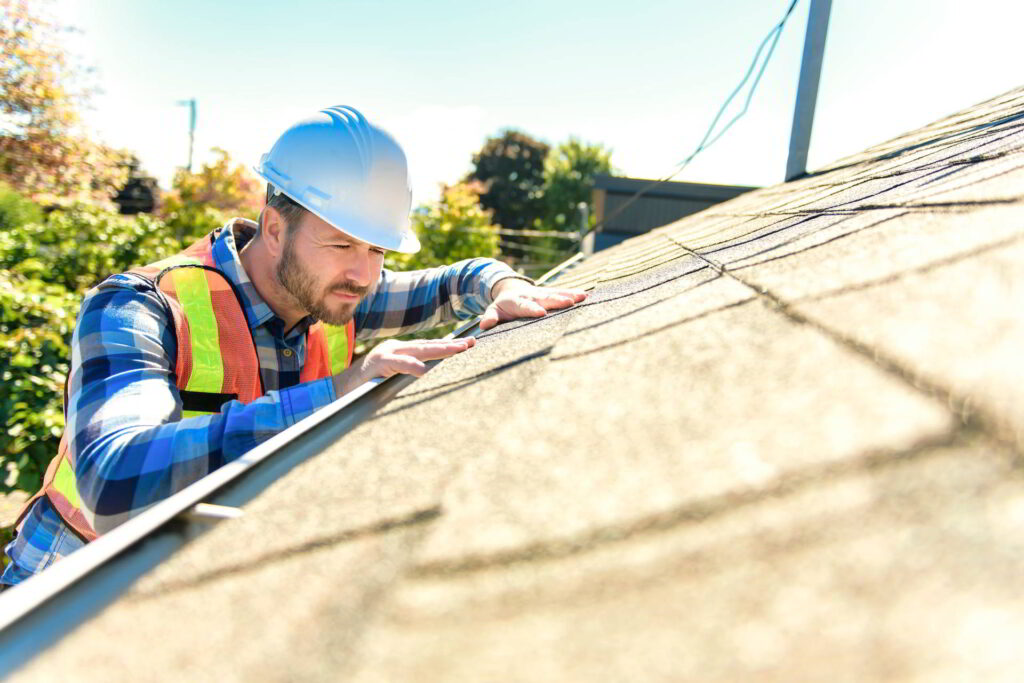
The Roof Inspection Process
After a storm has hit, inspecting the damage to your roof is crucial for filing a successful storm damage roof insurance claim. Here’s why professional inspections are important and how to deal with discrepancies in estimates.
Importance of Professional Inspection
A professional inspection is necessary for several reasons:
- Accurate Damage Assessment: Trained professionals from a roofing company are skilled at identifying damage that may not be immediately visible to the untrained eye.
- Justification for Insurance Claims: A detailed inspection report from a certified professional can help justify your claim to the insurance company, especially if their assessment differs from yours. According to Roof Simple, professional estimates can support your claim during disputes with the insurance company.
- Safety Concerns: Inspecting a damaged roof can be dangerous. Professionals have the right equipment and knowledge to conduct these inspections safely. For a guide on safety, read our article on DIY storm-damaged roof repair.
Professional inspections typically include a thorough examination of:
- Shingles
- Gutters
- Flashing
- Roofing materials (underlayment, tar paper)
Discrepancies in Estimates
It’s common for discrepancies to arise between the estimates provided by your roofer and the insurance adjuster’s assessment. Here’s how to handle these discrepancies:
- Get Multiple Estimates: Collect estimates from at least three reputable roofing contractors. This provides you with a range of options and gives you leverage when negotiating with your insurance company.
- Detailed Estimates: Ensure that these estimates include a breakdown of all costs, such as materials, labor, tear-off, clean-up, and disposal. As GAF suggests, detailed estimates help avoid unexpected costs.
| Cost Component | Estimated Cost ($) |
|---|---|
| Tear-off | 1,000 – 1,500 |
| Material | 3,000 – 4,500 |
| Labor | 2,000 – 3,000 |
| Clean-up | 500 – 750 |
| Disposal | 300 – 500 |
- Professional Justification: If the insurance company’s estimate is significantly lower, use the reports from professional roofers to argue your case. As noted by Roof Simple, these reports can help substantiate your claim.
- Documentation: Keep all original receipts and documents related to temporary repairs and inspections. This aids in verifying the costs and ensuring that you are reimbursed appropriately. More tips can be found in our article on how to fix storm-damaged roof.
Understanding the importance of professional inspections and knowing how to manage discrepancies in estimates will help ensure that your storm damage roof insurance claim process goes smoothly. Whether you’re dealing with unforeseen expenses or preparing for the insurance adjuster, having the right information at your fingertips is crucial.
Temporary Repairs and Documentation
When storm damage affects your roof, taking immediate action to minimize further harm is essential. Temporary repairs and detailed documentation are crucial steps in managing a storm damage roof insurance claim.
Preventing Further Damage
Temporary repairs prevent additional damage to your home. Simple steps like covering leaks with tarps or plywood can protect against further water intrusion. Keeping your home secure from additional harm is key. Roof Simple advises that these temporary measures are necessary and should be undertaken until professional repairs can be made (Roof Simple).
Temporary Repair Guidelines:
- Cover Leaks: Use tarps or plastic sheeting to cover any exposed areas.
- Secure Loose Shingles: Nail down or tape loose shingles to prevent them from flying off.
- Clear Debris: Remove branches and other debris that could cause additional damage.
Make sure to keep all receipts and records of any materials purchased for temporary repairs. This documentation is vital for submitting your claim later.
Documenting Expenses for Claims
Thorough documentation is critical when dealing with insurance claims. Keeping detailed records of all repairs and expenses ensures you have the evidence needed to validate your claim.
Documentation Tips:
- Take Before and After Photos: Photographs of the damage before any repairs and the state of the roof after temporary fixes.
- Keep Receipts: Store receipts for materials and any professional services related to temporary repairs.
- Detailed Logs: Maintain a log of all communications with contractors, insurance adjusters, and other related parties.
| Expense Type | Description | Amount |
|---|---|---|
| Materials | Tarps, nails, plywood, etc. | $200 |
| Professional Labor | Emergency roofing services | $500 |
| Additional Costs | Miscellaneous repair-related expenses | $100 |
By keeping detailed records, homeowners can ensure they are accurately compensated for all out-of-pocket expenses by their insurance company. For further guidance on handling storm damage, check our roof storm damage repair article.
For those who prefer handling repairs on their own, see our handy guide on DIY storm-damaged roof repair.
If you encounter any unexpected damage during the temporary repair process, communicate these findings to your insurance company immediately. Additional expenses discovered may be covered under a new check or included in the final payout (Roof Simple).
Keeping thorough records and performing essential repairs ensures that your roof can withstand future storms and serves as a reliable structure over your home. See comprehensive tips on how to fix storm-damaged roof for more information.
Communicating Additional Damage
Effectively communicating any additional damage discovered during the repair process is key to ensuring a smooth and successful storm damage roof insurance claim. This section will cover how homeowners can disclose unforeseen expenses and seek adjustments in their insurance payout.
Unforeseen Expenses Disclosure
During the repair process, unexpected damage or additional expenses may be discovered. It is crucial for homeowners to inform their insurance company about these findings promptly. According to Roof Simple, these unforeseen problems can often be covered in a third check or included in the final payout. Here’s how to manage this:
- Document the Damage: Take photographs and keep detailed records of any new damage that was not initially reported.
- Collect Repair Estimates: Obtain estimates from reputable contractors to provide a clear picture of the additional costs.
- Notify Insurance Company: Contact your insurance provider as soon as possible to report the new damage. Provide them with the documentation and repair estimates.
| Step | Action | Notes |
|---|---|---|
| 1 | Document the new damage | Photos and detailed notes |
| 2 | Collect repair estimates | Use reputable contractors |
| 3 | Notify insurance company | Submit documentation |
Adjustments in Insurance Payout
Insurance policies often cover damage from incidents like hail, water, and freeze-related issues. According to Forbes, roof damage caused by hail can lead to the repair or replacement of the roof, depending on the severity and coverage specifics. If unforeseen damages are identified, insurance payouts may need to be adjusted:
- Communicate Promptly: Notify your insurance adjuster or representative about the new damage immediately.
- Provide Estimates: Submit the newly collected estimates for the additional repairs.
- Request Re-inspection: In cases where the additional damage is significant, request that an adjuster revisit your property for a re-inspection.
| Scenario | Action Taken | Result |
|---|---|---|
| New damage discovered | Communicate promptly | Updated claim |
| Significant additional damage | Request re-inspection | Potential for re-evaluation |
Be aware that repairs resulting from improper maintenance or neglected preventative measures may not be covered, as outlined by Tighe P.A.. Ensure all communications and documents are thorough and organized to streamline the process.
For further assistance, consider checking out additional resources or guidelines on how to fix storm-damaged roof and DIY storm-damaged roof repair. These practices help ensure you’re well-prepared to handle any discrepancies and additional costs that arise during the roof repair process.
Best Practices in Roof Claim Process
When filing a storm damage roof insurance claim, adhering to best practices can smooth the process and maximize your claim. Here are some essential strategies.
Timely Responses and Documentation
Timeliness and thorough documentation are crucial. Prompt action ensures that you stay within the deadlines set by your insurance company and that your claim is given priority. Here are the key steps:
- Notify Your Insurance: Contact your insurer immediately to report the damage.
- Review Your Policy: Understand your coverage and what is required for the claim. Keep in mind that filing unnecessary claims can have long-lasting consequences (Roof Simple).
- Document Everything: Take clear photos and videos of the damage from multiple angles. Document all interactions with your insurance company and contractors.
- Keep Receipts: Save receipts for temporary repairs and any other expenses related to the damage.
| Step | Action |
|---|---|
| 1 | Notify Your Insurance |
| 2 | Review Your Policy |
| 3 | Document Everything |
| 4 | Keep Receipts |
Preparation for Insurance Adjuster
Being well-prepared for the insurance adjuster’s visit can make a significant difference in your claim outcome. Here’s how to prepare:
- Professional Inspection: Hire a trusted roofer to inspect your roof and provide a detailed report. The roofer can serve as a liaison between you and the insurance company.
- Compile Evidence: Gather all documentation, photos, videos, and receipts in an organized manner. This will help in presenting a clear case.
- Walkthrough with Adjuster: If possible, have your roofer present during the insurance adjuster’s visit to ensure that all damage is properly identified and documented. The roofer’s assessment may differ from the adjuster’s, but their expertise can support your claim.
For more tips on handling storm-damaged roofs, visit our articles on roof storm damage repair and how to fix storm-damaged roof.
Following these best practices will help you navigate the roof insurance claim process successfully, ensuring that you receive the compensation you deserve to repair your home.